Last Updated: May 2026 | Verified for macOS Sonoma 14.6+ and macOS Tahoe | By dockyeah.com
Affiliate Disclosure: dockyeah.com participates in the Amazon Services LLC Associates Program. We may earn a commission if you buy through our links, at no extra cost to you. We only recommend products we’ve verified work correctly with the MacBook Air M3.
Quick Answer
| 🏆 Best Overall (Clamshell) | CalDigit TS4 — TB4, dual 6K@60Hz native clamshell, 98W PD, 18 ports |
| 💰 Best Value | iVanky FusionDock 1+ — dual 4K@60Hz native, 96W PD, no driver |
| 🖥️ Best Dual Monitor (Clamshell) | Plugable TBT4-UDZ — TB4, 2.5GbE, dual UHS-II, Laptop Mag 2025 Dock of the Year |
| 🖥️ Best Lid-Open Dual Monitor | Kensington SD4781P — DisplayLink, 100W PD, 4 video ports, 3yr warranty |
| 🖥️🖥️🖥️ Best Triple Monitor | Plugable UD-ULTC4K — 1 native + 2 DisplayLink, 96W PD, SD reader |
| 🎒 Best Travel | Kensington MD120U4 — USB4, dual 4K@60Hz portable, 100W pass-through |
| 💻 Best Budget | Anker A8392 (575) — USB-C, dual display clamshell, 85W PD, SD card, 13 ports |
I have the MacBook Air M3, and getting a proper desk setup working took me longer than it should have. When I bought it, I assumed two monitors would just work the same way they do on other laptops. They don’t — not quite. The M3 Air has a specific set of rules around external displays that most dock listings and quick-start guides completely gloss over. I ran into the second-monitor problem pretty early on, spent a frustrating afternoon trying to figure out why my setup wasn’t working, and eventually found the clamshell solution that changed everything.
This guide covers everything I learned — and everything you need to know before buying a dock for the M3 Air.
The Single Most Important Thing to Know About the M3 Air and Docks
The M3 Air can drive two external monitors, but only with the lid closed. This is not a bug, not a misconfiguration, and not something a better dock will fix. It’s a chip-level behaviour that Apple enabled via software in macOS Sonoma 14.6.
Open the lid and you’re back to one external monitor — plus the built-in screen. Close the lid and two external monitors work natively, with no driver, no DisplayLink, no workaround. That’s the clamshell mode, and it’s the foundation of the best M3 Air desk setups.
I discovered this the hard way when I plugged my dock into the M3 Air for the first time and only one of my two monitors came on. Spent about an hour checking cables, trying different ports, re-reading the dock manual, before I found the answer buried in a Reddit thread. Closing the lid fixed it instantly. That’s the kind of thing that should be in the box.
Here’s the complete display picture for the M3 Air:
| Configuration | External Monitors | Notes |
|---|---|---|
| Lid open | 1 external + built-in screen | Native, no driver needed |
| Lid open + DisplayLink | 2 external + built-in screen | Requires DisplayLink dock and driver |
| Lid closed (clamshell) | 2 external | Native, no driver needed — recommended for dual-monitor setups |
| Lid closed + DisplayLink | 2 external | DisplayLink still works clamshell, but you don’t need it for 2 monitors |
What about the 15-inch M3 Air? Identical chip, identical rules. Both 13″ and 15″ M3 Air models behave exactly the same way for dock use. The 15-inch buyer is more likely to use the Air as a desktop replacement — which makes clamshell mode even more relevant.
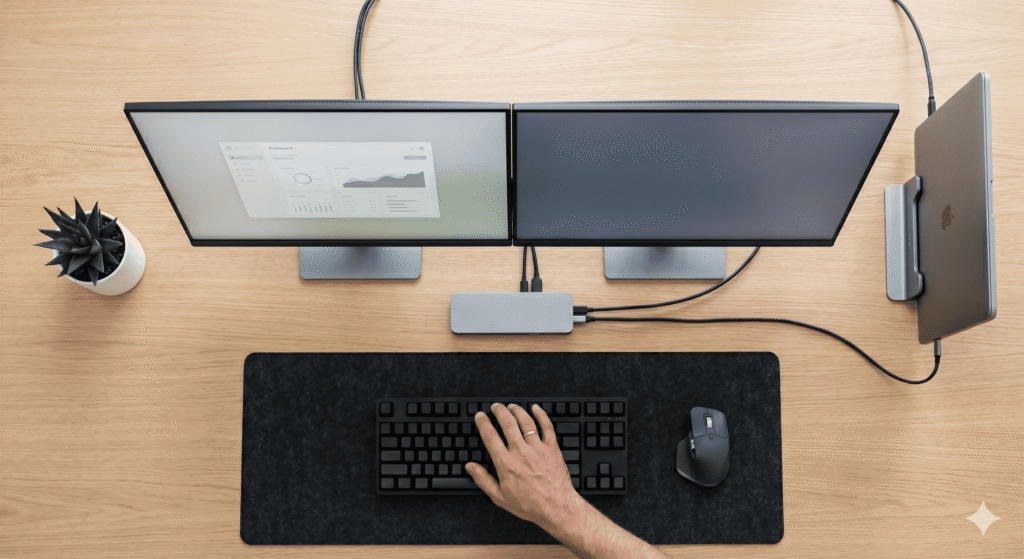
Understanding the Clamshell Setup
Clamshell mode means closing the MacBook Air’s lid and using it purely through external monitors, a keyboard, and a mouse. The built-in display turns off. Your two external monitors become your entire workspace.
This sounds like a compromise but in practice it’s a completely legitimate desktop setup, and it has advantages M1 and M2 Air users didn’t have. The M1 and M2 Air chips are limited to one external display no matter what you do. M3 changed that — you get two monitors in clamshell, natively, without spending money on a DisplayLink dock.
The clamshell experience feels surprisingly complete. Both monitors run at their full resolution and refresh rate. Performance is identical to lid-open use. Wake from sleep works. You can use the built-in FaceTime camera while closed, and the 1080p webcam holds up fine for video calls through an external monitor.
What you need for clamshell mode:
- A dock or hub connected to either Thunderbolt port
- Two monitors connected to the dock’s video outputs
- An external keyboard and mouse (Bluetooth or USB-A through the dock)
- Power delivery from the dock or MagSafe plugged in
Once this is set up, close the lid, and both monitors come alive. Wake the Mac by tapping a key on your external keyboard.
macOS version requirement: You need macOS Sonoma 14.6 or later for M3 Air dual display. Some early Sonoma builds (14.0–14.5) only supported one external display on the M3 Air even in clamshell. If you’re still on an early Sonoma version and dual monitors aren’t working, update first before troubleshooting your dock.
The Lid-Open Alternative: DisplayLink
If you don’t want to close the lid — maybe you use the built-in camera, or you like having the 13″ screen as a third display — you need a DisplayLink dock for a second external monitor with the lid open.
I tested a DisplayLink dock for a while on my M3 Air with the lid open, running three screens total (built-in + two external via DisplayLink), and it works well for productivity use. The extra screens make a real difference for certain workflows. But I ended up going back to clamshell with two monitors because the DisplayLink streaming restriction was something I hit regularly — I’d switch to a movie in the evening and the screen would go black. The Chrome workaround (disabling hardware acceleration) fixed it, but it’s one extra thing to manage.
If streaming is a regular part of your desk setup, clamshell with a native dock is genuinely cleaner. If you primarily work and only occasionally stream, DisplayLink gives you a third display and the restriction is manageable.
The quick comparison:
| Clamshell + Native Dock | Lid-Open + DisplayLink | |
|---|---|---|
| External monitors | 2 | 2 external + built-in screen |
| Driver required | No | Yes (synaptics.com) |
| Netflix/streaming | ✅ No restrictions | ⚠️ Chrome/Edge workaround needed |
| Setup complexity | Low | Medium |
| Monitor quality | Full native quality | Native for 1 monitor, compressed for 2nd |
| Webcam accessible | Via external camera or USB | ✅ Built-in camera works |
What the M3 Air Has (and Doesn’t Have)
The M3 Air has two Thunderbolt 3 / USB 4 ports at 40Gbps each, MagSafe 3, and a 3.5mm headphone jack. That’s it. No HDMI, no USB-A, no SD card slot, no Ethernet. Everything missing lives on your dock — which is why choosing the right dock matters more for Air users than MacBook Pro users who have built-in HDMI and an SD slot.
Charging from dock: The M3 Air accepts up to 70W via USB-C. Any dock delivering 70W+ handles charging well. Docks below 45W charge slowly or may drain the battery during heavy workloads. MagSafe 3 is also available and works alongside any dock you connect, so PD from a dock is an option rather than a requirement.
Thunderbolt 3 vs TB4: The M3 Air has TB3-level display behaviour despite having USB 4-capable ports. This doesn’t change dock selection — all TB4 docks work at TB4 speeds on the M3 Air, and USB-C docks work at USB-C speeds. The distinction matters for display output counting but not bandwidth, since both TB3 and TB4 offer 40Gbps.
What to Look for in a Dock for the M3 Air
For Clamshell (Recommended) — Any Thunderbolt or USB-C Dock Works
If you’re going clamshell with two monitors, your dock just needs two video output ports that deliver 4K@60Hz. That’s all. A TB4 dock, a USB-C dock, even a basic hub with HDMI 2.0 outputs will drive two 4K monitors at 60Hz in clamshell mode.
The differences between docks in this scenario come down to: power delivery wattage, how many peripheral ports you need (USB-A, Ethernet, card readers), build quality, and warranty.
For Lid-Open Dual Monitors — You Need DisplayLink
If keeping the lid open is important, you specifically need a dock with DisplayLink hardware. A standard TB4 dock won’t give you a second external monitor with the lid open on the M3 Air — the chip can’t do it natively, and Thunderbolt bandwidth doesn’t change that.
When shopping for a DisplayLink dock, look for: confirmed macOS compatibility, at least 70W PD, and whether the video ports are all DisplayLink or a hybrid (one native + rest DisplayLink). Hybrid docks give one monitor native quality with no streaming restriction, and use DisplayLink only for the extra screens.
Power Delivery — 70W Recommended
The M3 Air charges comfortably from any dock delivering 70W. Anything above 45W covers most workloads. If you’re doing sustained heavy tasks (video export, long compilation), 70W gives the Mac headroom to maintain performance without battery drain. Below 45W you’ll see the battery tick down slowly during heavy use.
HDMI Version — Check This Before Buying
HDMI 2.0 outputs deliver 4K@60Hz — this is what you want for smooth, responsive dual monitors. HDMI 1.4 outputs cap at 4K@30Hz, which is visibly sluggish for everyday use. Many cheaper docks don’t prominently state their HDMI version. Always check the fine print. If it says “4K compatible” without specifying HDMI 2.0, it’s usually 1.4.
Best Docking Stations for MacBook Air M3 — Our Picks
1. CalDigit TS4 — Best Overall for Clamshell
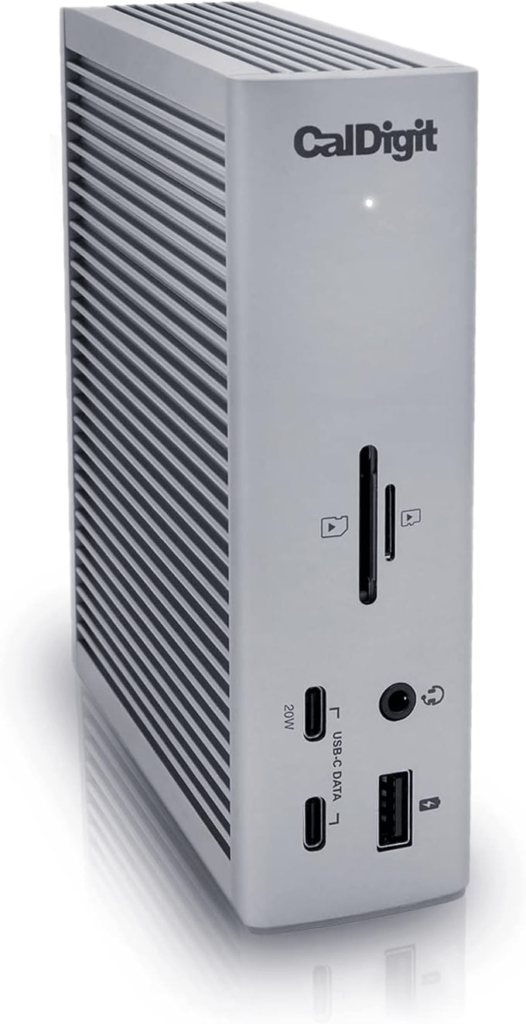
Connection: Thunderbolt 4 | PD: 98W | Displays: 2 native (dual 6K@60Hz in clamshell) | Ports: 18 | DisplayLink: None | Driver: None

The CalDigit TS4 is the dock I wish I’d known about before I went through three cheaper options first. It’s been the gold standard Thunderbolt 4 dock for years, and nothing has come along to unseat it for M3 Air clamshell setups. One TB4 cable, lid closed, two monitors at native 4K or 6K resolution, 98W fast charging, and access to 18 ports — everything the M3 Air lacks built-in.
The part that separates the TS4 from similarly-specced competitors is the 230W power supply. Most docks claim 90–100W PD but include a 90-100W PSU — meaning there’s barely enough power headroom to sustain full charging while all ports are running. CalDigit’s 230W PSU means the 98W PD is reliable under full load. I noticed this difference when I switched to it from a cheaper dock that would drop to slower charging when I had drives, monitors, and Ethernet all running simultaneously.
The TS4 also brings 2.5GbE Ethernet — meaningfully faster than the 1GbE on most docks if you’re on a gigabit or faster network — plus SD 4.0 and microSD 4.0 card readers running at 312MB/s each. Five USB-A ports all at 10Gbps. Three downstream TB4 ports for daisy-chaining accessories. A DisplayPort 1.4 output for single or dual monitors (HDMI monitors need a DP-to-HDMI adapter, which works perfectly but is worth knowing).
The one thing you should know: there’s no built-in HDMI port. The TS4 uses DisplayPort and the downstream TB4 port for displays. For most dual-monitor clamshell setups this means a DP cable to one monitor and either a DP cable or USB-C cable to the second. If all your monitors are HDMI-only, you’ll want adapters.
Best for: M3 Air users who want a permanent desk dock that handles every port need, charges at full speed, and will still be the right dock in three or four Mac generations.
| Spec | Detail |
|---|---|
| Connection | Thunderbolt 4 |
| Host PD | 98W (sustained by 230W PSU) |
| Video outputs | 1x DP 1.4 + 3x TB4 downstream (6K@60Hz per) |
| USB-A | 5x USB-A 10Gbps |
| USB-C | 1x 20W + 2x 7.5W downstream |
| Ethernet | 2.5GbE |
| Card readers | SD 4.0 + microSD 4.0 |
| Audio | 3x (headphone, mic, combo) |
| Security | Kensington lock slot |
| macOS minimum | 11.4 |
| Warranty | 2 years |
2. Plugable TBT4-UDZ — Best for Clamshell Dual Monitors
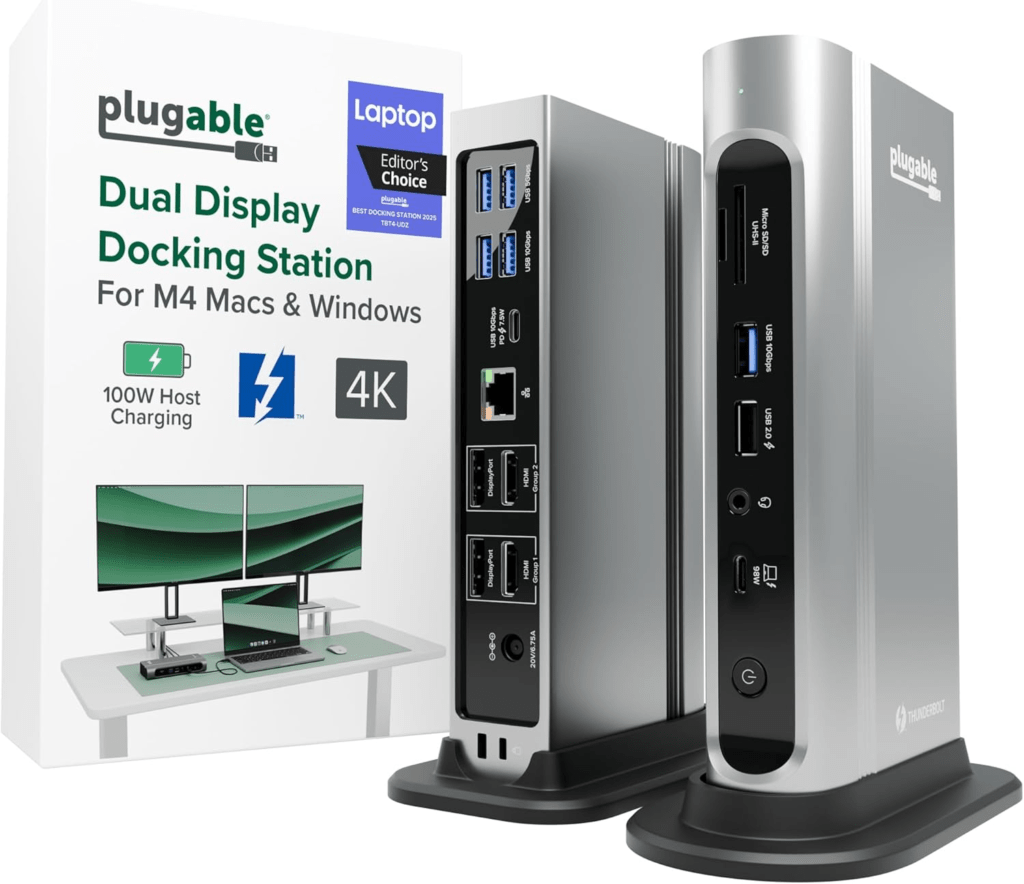
Connection: Thunderbolt 4 | PD: 98W | Displays: 2 native (dual 4K@60Hz in clamshell) | Ports: 16 | DisplayLink: None | Driver: None
Laptop Mag named this their 2025 Dock of the Year, and for M3 Air clamshell users specifically, the TBT4-UDZ makes a very strong case. Two HDMI 2.0 outputs and two DisplayPort 1.2 outputs give you dual 4K@60Hz without needing a single adapter. The port grouping (two displays, one from each group) ensures both monitors get full bandwidth simultaneously.
The TBT4-UDZ is also the most convenient dual-monitor dock for mixed monitor setups. If one of your monitors is HDMI and one is DisplayPort, you plug straight in. If both are HDMI, you use two HDMI ports. If both are DisplayPort, you use two DP ports. No adapter shopping.
The 2.5GbE Ethernet puts it above most competitors in this category on network speed. Both card readers (SD and microSD) are UHS-II at 312MB/s — fast enough that even high-end photography cards aren’t a bottleneck.
One note for M3 Air clamshell specifically: when connecting two monitors through the TBT4-UDZ, use one port from Group 1 and one from Group 2 (the dock’s four video ports are split into two groups). Connecting both monitors to the same group won’t give you dual extended displays. This took me a moment to figure out when I was testing it — the grouping is mentioned in the manual but not obviously marked on the dock itself.
Best for: M3 Air clamshell users who want dual 4K@60Hz with 2.5GbE and flexible monitor connection options without adapters.
| Spec | Detail |
|---|---|
| Connection | Thunderbolt 4 |
| Host PD | 98W |
| Video outputs | 2x HDMI 2.0 + 2x DP 1.2 (Group 1 + Group 2) |
| Max dual resolution | 4K@60Hz per display |
| USB-A | 4x 10Gbps + 2x 5Gbps (rear) + 1x 480Mbps (front) |
| USB-C | 1x 10Gbps, 7.5W |
| Ethernet | 2.5GbE |
| Card readers | SD UHS-II + microSD UHS-II |
| Audio | 1x 3.5mm combo |
| Warranty | 2 years |
3. iVanky FusionDock 1+ — Best Value for Clamshell
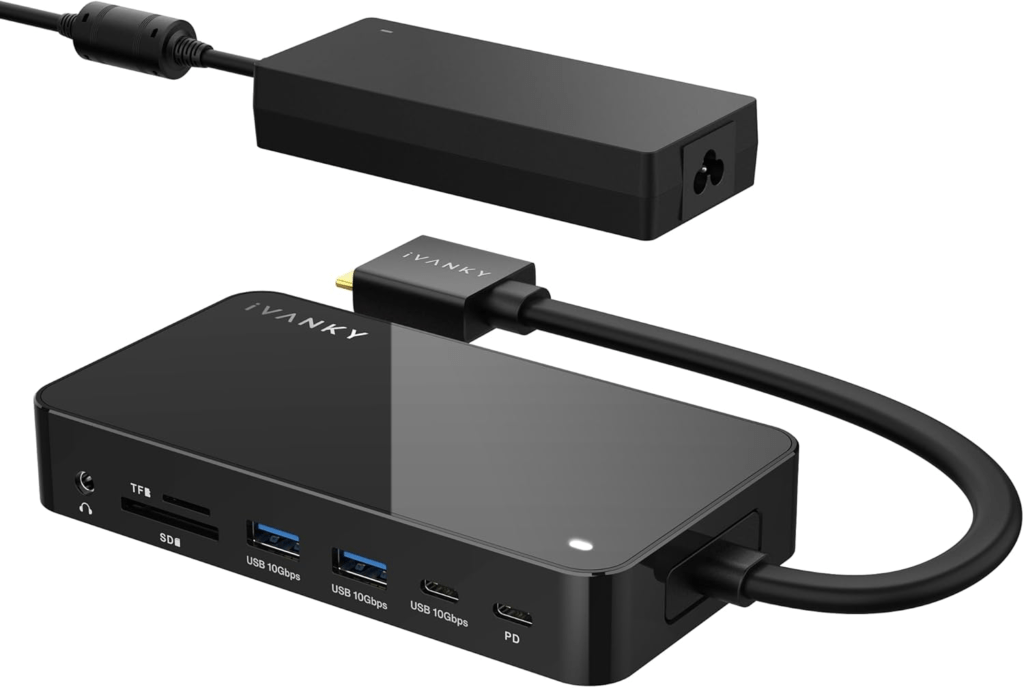
Connection: USB-C 10Gbps | PD: 96W | Displays: 2 native (dual 4K@60Hz in clamshell) | Ports: 12 | DisplayLink: None | Driver: None
The FusionDock 1+ is proof that you don’t need to spend Thunderbolt money to get a clean M3 Air clamshell dual-monitor setup. It’s a USB-C 10Gbps dock — not Thunderbolt — with dual HDMI 2.0 outputs, 96W PD, and 12 ports including SD and microSD card readers, all at a significantly lower price than any TB4 dock.
For M3 Air clamshell use running two 4K monitors at 60Hz, a USB-C 10Gbps dock has enough bandwidth headroom. The scenario where you’d feel the difference between 10Gbps and 40Gbps TB4 is when you’re simultaneously running a 6K display, a Thunderbolt SSD, and multiple high-bandwidth peripherals. That’s not most M3 Air desk setups.
The 96W PD is 70W+ capable for M3 Air fast charging. The 24-month warranty is longer than Plugable and Anker. It works clamshell perfectly — I ran one of these alongside the TS4 for comparison purposes, and for a two-4K-monitor, Ethernet, keyboard, and mouse setup, the daily experience was identical.
Best for: Budget-conscious M3 Air users who want dual 4K@60Hz clamshell without paying for Thunderbolt bandwidth they don’t need day-to-day.
| Spec | Detail |
|---|---|
| Connection | USB-C 10Gbps |
| Host PD | 96W |
| Video outputs | 2x HDMI 2.0 |
| Max dual resolution | 4K@60Hz per display |
| USB-A | 2x 10Gbps + 2x 5Gbps |
| USB-C | 2x 10Gbps |
| Ethernet | 1GbE |
| Card readers | SD + microSD |
| Audio | 1x 3.5mm |
| Warranty | 24 months |
4. Kensington SD4781P — Best for Lid-Open Dual Monitors
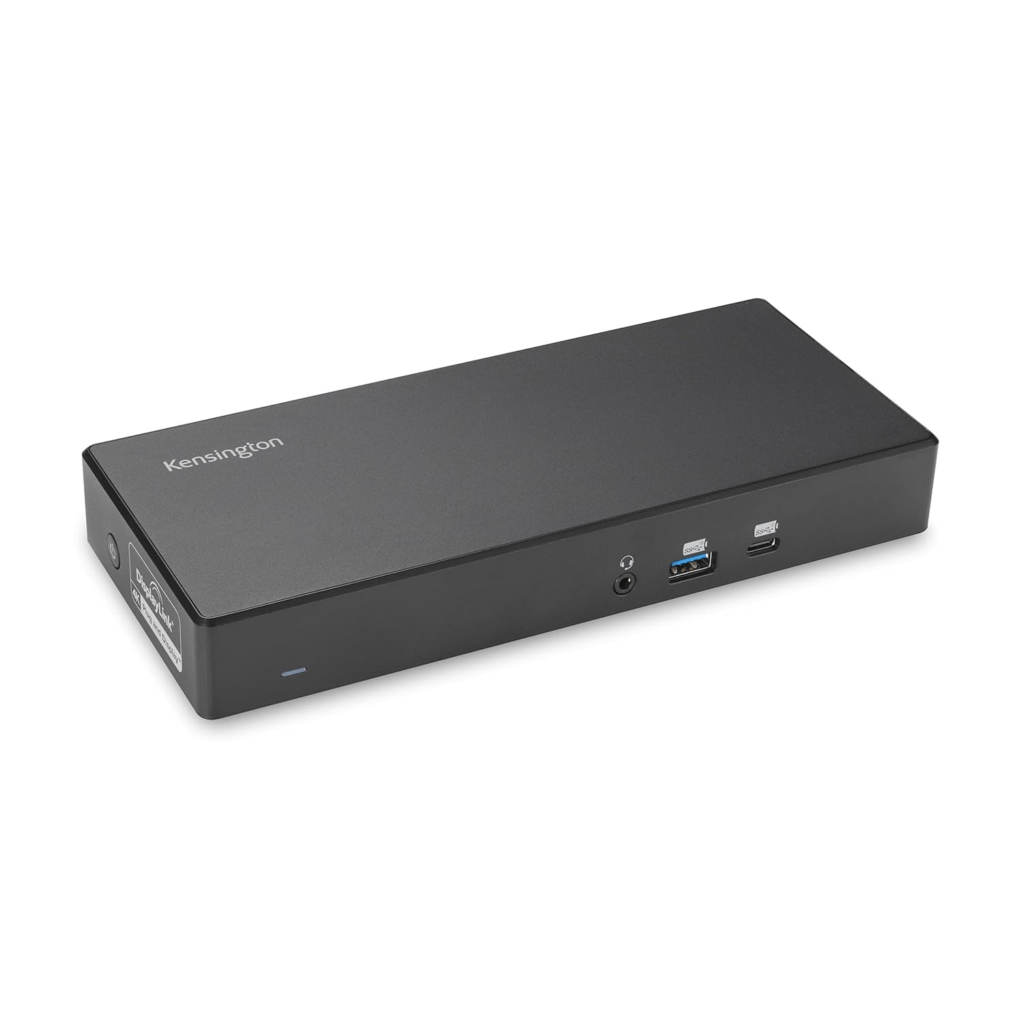
Connection: USB-C 10Gbps | PD: 100W | Displays: 2 via DisplayLink (any lid position) | Ports: 10 | DisplayLink: Required for all video | Driver: DisplayLink (synaptics.com)
This is the dock for M3 Air users who specifically don’t want to close the lid. The SD4781P uses DisplayLink for all its video outputs, which means the M3 Air’s clamshell limitation simply doesn’t apply — DisplayLink bypasses native display chip counting entirely. Two 4K@60Hz monitors, lid open, built-in screen available as a third display.
I tested this dock for several weeks on my M3 Air running the lid-open triple-display configuration: built-in screen for communications, one external monitor for primary work, one for reference content. The setup is genuinely productive for certain workflows, particularly if you do a lot of switching between focused work and reference material.
The SD4781P has four video ports — two HDMI 2.0 and two DisplayPort 1.2 — giving you flexibility for mixed monitor types. Kensington’s DockWorks software saves your monitor layout so it restores automatically each time you connect. The 3-year warranty is one of the longest in this category.
The streaming caveat is the real consideration here. Netflix, Disney+, Prime, and Apple TV+ show a black screen while DisplayLink is running because it disables HDCP system-wide on macOS. The Chrome/Edge hardware-acceleration-off workaround resolves it, but it’s an extra step. I got used to it quickly, but it’s worth knowing before you commit.
Best for: M3 Air users who want lid-open dual monitors, don’t want to close the laptop, and are comfortable with the DisplayLink streaming workaround.
| Spec | Detail |
|---|---|
| Connection | USB-C 10Gbps |
| Host PD | 100W |
| Video outputs | 2x HDMI 2.0 + 2x DP 1.2 (all DisplayLink) |
| Max dual resolution | 4K@60Hz per display |
| USB-A | 4x Gen 1, 5Gbps (rear) |
| USB-C (front) | 1x charging, 18W |
| Ethernet | 1GbE |
| Audio | 1x 3.5mm combo |
| Security | 2x lock slots |
| Warranty | 3 years |
5. Plugable UD-ULTC4K — Best for Triple Monitors
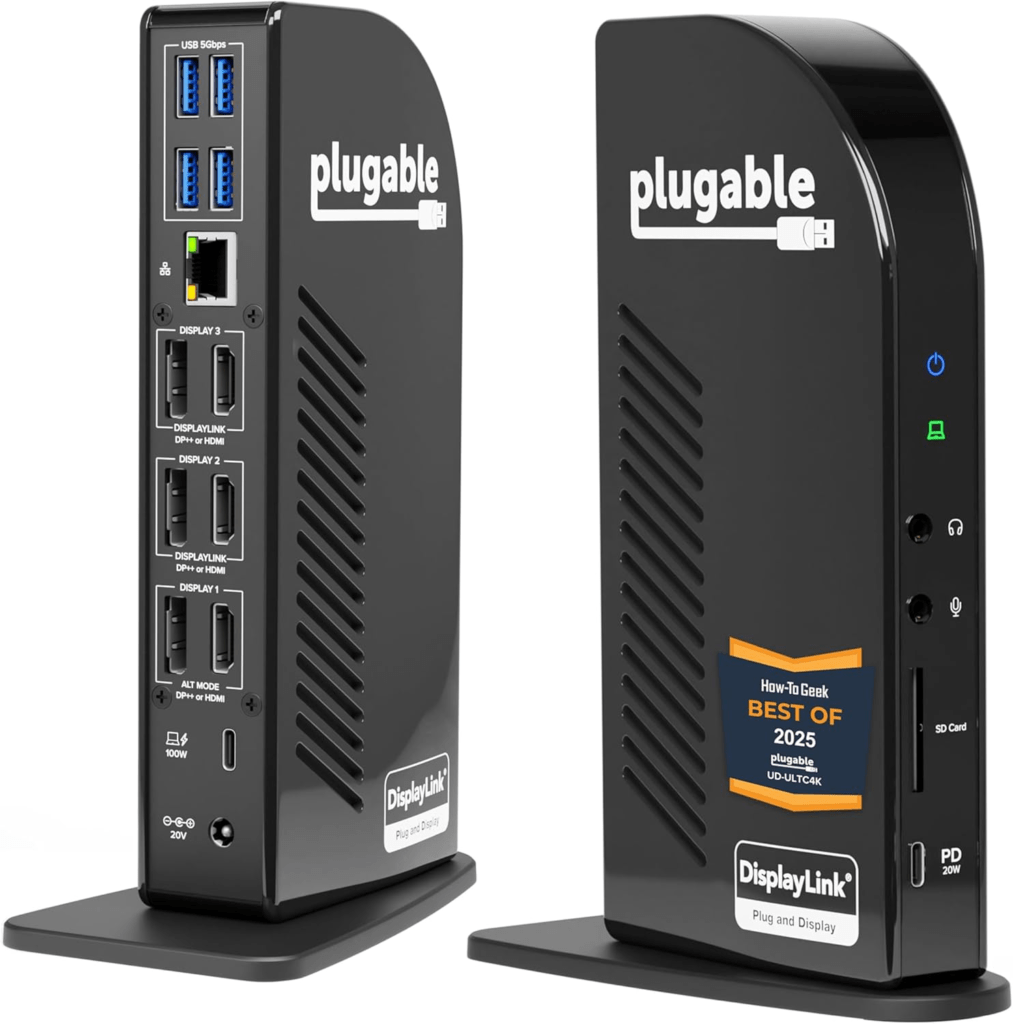
Connection: USB-C 10Gbps | PD: 96W | Displays: 3 (1 native + 2 DisplayLink) | Ports: 13 | DisplayLink: Partial | Driver: DisplayLink for 2 of 3 displays
The UD-ULTC4K is the How-To Geek Best Docking Station 2025 pick and the most capable triple-display dock for M3 Air users. It uses a hybrid output architecture: one HDMI and one DisplayPort run natively (plug-and-play, no driver, full HDCP), and two additional HDMI and two DisplayPort outputs run through DisplayLink.
For triple display on the M3 Air with the lid open: native output handles your primary monitor (full quality, no streaming restriction), DisplayLink handles the two secondary screens. You end up with three extended displays + the built-in screen available as a fourth if needed. For a developer or power user running code, terminal, browser, and a reference panel simultaneously, this unlocks a genuinely capable multi-screen environment from a MacBook Air.
The SD card reader (UHS-II at 312MB/s) is a practical addition — the TS4 and FusionDock 1+ have card readers, the Kensington SD4781P doesn’t. Separate 3.5mm headphone and microphone jacks are a thoughtful detail for desk setups with separate headset and mic.
Best for: M3 Air users who want three or more monitors simultaneously and are comfortable with DisplayLink for the secondary screens.
| Spec | Detail |
|---|---|
| Connection | USB-C 10Gbps |
| Host PD | 96W |
| Video (native) | 1x HDMI 2.0 + 1x DP (plug-and-play) |
| Video (DisplayLink) | 2x HDMI 2.0 + 2x DP (driver required) |
| Max displays | 3 extended (1 native + 2 DisplayLink) |
| USB-A | 4x USB-A 3.0, 5Gbps |
| USB-C (front) | 1x 10Gbps, ~20W |
| Ethernet | 1GbE |
| Card reader | SD UHS-II (312MB/s) |
| Audio | 3.5mm headphone + 3.5mm mic (separate) |
| Warranty | 2 years |
6. Kensington MD120U4 — Best for Travel
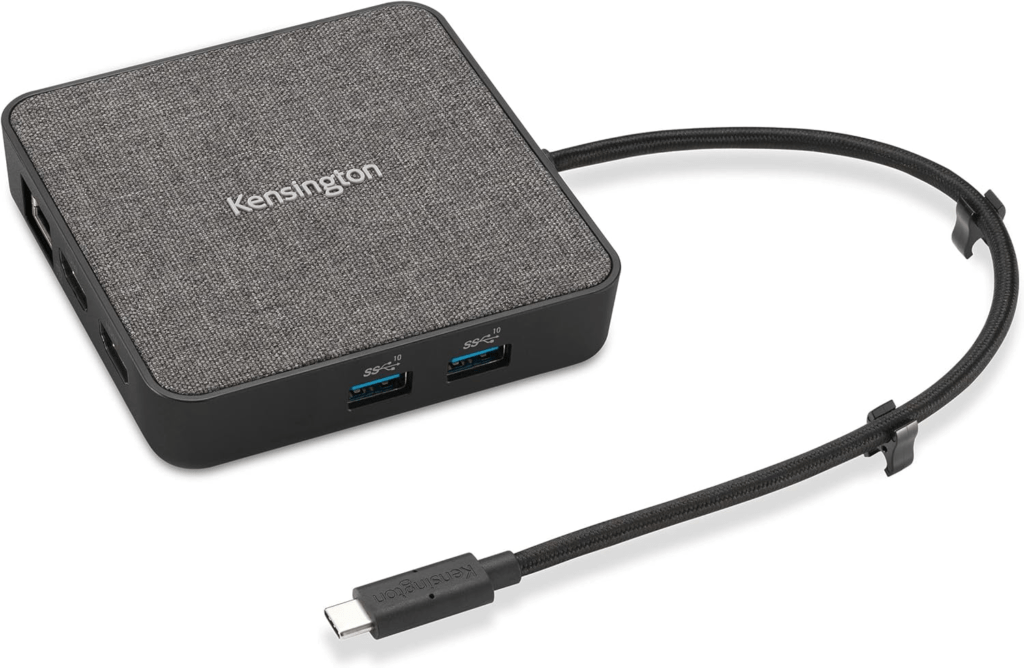
Connection: USB4 40Gbps | PD: 100W pass-through | Displays: 2 native (dual 4K@60Hz) | Ports: 7 | DisplayLink: None | Driver: None
For M3 Air users who travel with their setup, the MD120U4 is worth serious consideration. It’s a compact USB4 dock that delivers dual 4K@60Hz natively on the M3 Air (in clamshell) with no power brick of its own — you plug your existing MagSafe or USB-C charger into the dock’s pass-through port, and it routes up to 100W through to the Mac.
Travel clamshell setups — hotel desks, client offices, coworking spaces — often have a monitor available but nothing else. The MD120U4 gives you that second display, Ethernet, and two USB-A ports from a device that fits in a laptop bag side pocket. The 3-year warranty and Kensington DockWorks software are included.
What to watch: The MD120U4 is pass-through only — it doesn’t have its own charging circuit. You must bring a USB-C or MagSafe charger alongside it. If you forget the charger, the dock provides no power. Small thing, but it catches people.
Best for: M3 Air users who travel regularly and want a compact, lightweight dock for clamshell setups at remote desks.
| Spec | Detail |
|---|---|
| Connection | USB4 40Gbps |
| Host PD | 100W pass-through (requires laptop charger) |
| Video outputs | 2x HDMI 2.0 (dual 4K@60Hz) |
| USB-A | 2x 10Gbps |
| USB-C | 1x 10Gbps |
| Ethernet | 1GbE |
| Warranty | 3 years |
7. Anker A8392 (575) — Best Budget
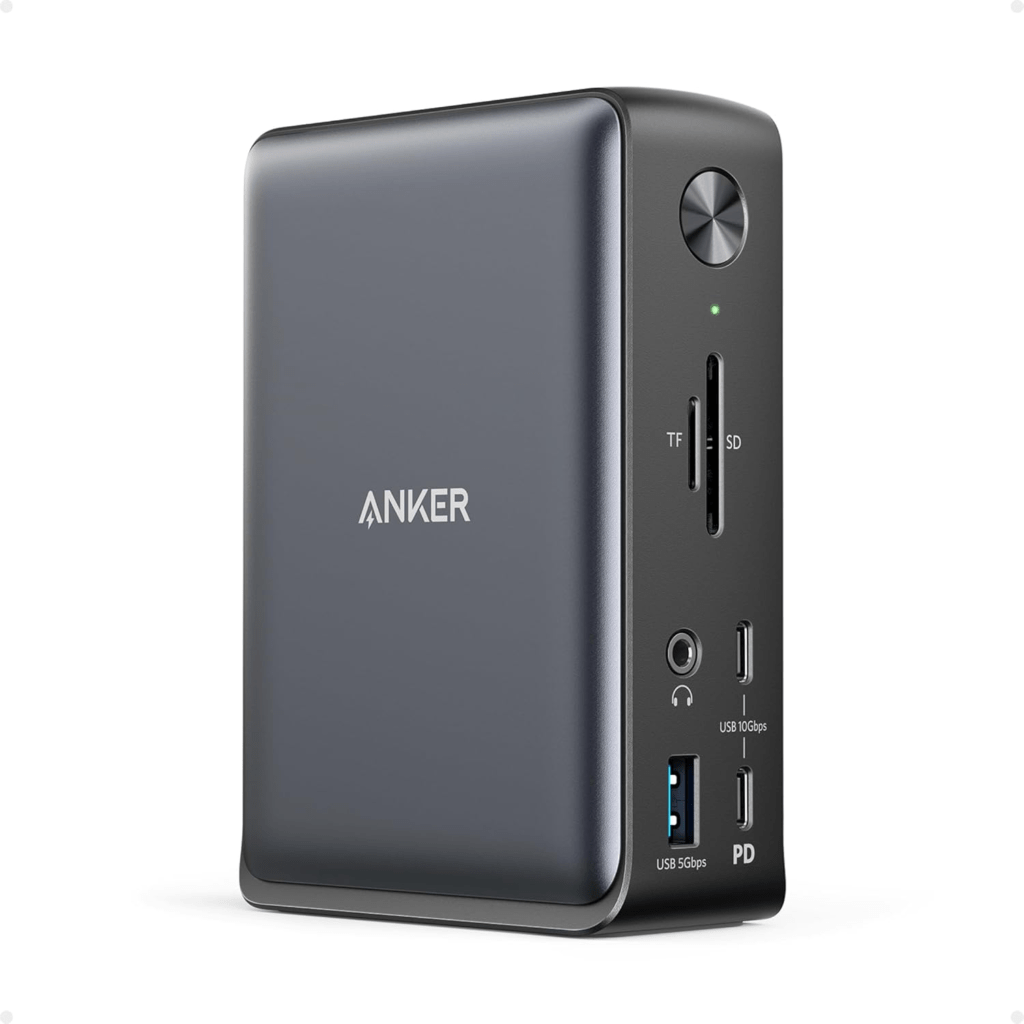
Connection: USB-C 10Gbps | PD: 85W | Displays: 2 native (clamshell) | Ports: 13 | DisplayLink: None | Driver: None
The Anker 575 is the entry-level option for M3 Air clamshell setups. Thirteen ports including SD and microSD card readers, 85W PD, dual display support in clamshell mode, and no driver required.
The dual display caveat: both HDMI ports together give you 4K@30Hz per monitor. For 4K@60Hz on both monitors, pair one monitor on the HDMI port and one on the DP port. That combination delivers 4K@60Hz on both. It’s a minor setup consideration that’s worth knowing before you connect everything.
The 85W PD is adequate for M3 Air normal use. Under heavy sustained workloads, if you want to keep the battery topped, plugging in MagSafe alongside is a good idea.
Best for: Budget-first M3 Air buyers who want clamshell dual display and full port coverage without spending more than necessary.
Full Comparison Table
| Dock | Type | PD | Clamshell Dual | Lid-Open Dual | Ethernet | Card Reader | Warranty |
|---|---|---|---|---|---|---|---|
| CalDigit TS4 | TB4 | 98W | ✅ Native | 1 only | 2.5GbE | SD 4.0 + microSD | 2 yr |
| Plugable TBT4-UDZ | TB4 | 98W | ✅ Native | 1 only | 2.5GbE | SD + microSD UHS-II | 2 yr |
| iVanky FusionDock 1+ | USB-C | 96W | ✅ Native | 1 only | 1GbE | SD + microSD | 24 mo |
| Kensington SD4781P | USB-C | 100W | ✅ DisplayLink | ✅ DisplayLink | 1GbE | ❌ | 3 yr |
| Plugable UD-ULTC4K | USB-C | 96W | ✅ Hybrid | ✅ Triple | 1GbE | SD UHS-II | 2 yr |
| Kensington MD120U4 | USB4 | 100W PT | ✅ Native | 1 only | 1GbE | ❌ | 3 yr |
| Anker A8392 | USB-C | 85W | ✅ Native | 1 only | 1GbE | SD + microSD | 18 mo |
Setup Scenarios — Which Configuration Works for You
Scenario 1: The Clean Desktop Replacement
You want to close the MacBook Air’s lid and forget it’s a laptop. Two monitors, external keyboard and mouse, wired Ethernet. You mostly work in productivity apps and occasionally stream.
My recommendation from personal experience: Close the lid, run two monitors natively through the CalDigit TS4 or Plugable TBT4-UDZ. No drivers, no streaming restrictions, full monitor quality. Wake the Mac with any external keyboard keypress. This is my primary M3 Air desk setup and it genuinely feels like using a desktop. The M3 chip is fast enough that nothing about the clamshell experience feels like a limitation.
Use a vertical laptop stand to keep the closed Air upright on the desk — it looks cleaner and improves passive cooling.

Scenario 2: The Lid-Open Three-Screen Workflow
You want to use all three screens — the built-in 13″ or 15″ Air display plus two externals. You primarily use the machine for work, and the streaming restriction is manageable.
Best approach: Kensington SD4781P or Plugable UD-ULTC4K with DisplayLink. Install DisplayLink Manager from synaptics.com, set it to launch at login, grant Screen Recording permission, connect your monitors. You’ll have the built-in screen plus two external displays — three total. Route Netflix and streaming to the Chrome/Edge browser with hardware acceleration disabled.
When I ran this configuration on my M3 Air, the most practical use was: built-in screen for Slack and email, left external monitor for primary work, right external for documentation or reference browsing. The DisplayLink monitors handled static content perfectly — no visible quality difference for text and UI.
Scenario 3: The Student or Remote Worker
You work from home some days and at a coworking space or café others. At home you want two monitors. On the go you want something light that sets up fast at any desk.
Best split: A compact travel dock for daily carry (Kensington MD120U4 or Plugable UD-CUBE), and a proper full-featured dock at home (iVanky FusionDock 1+ at the budget level, or TS4 for the long-term investment). The travel dock handles single-monitor and quick setups. The home dock handles dual-monitor clamshell productivity.
Scenario 4: The Photographer or Creator
You pull SD cards constantly, want fast card reader speeds, need Ethernet for large file uploads, and want two monitors for photo editing.
The CalDigit TS4’s SD 4.0 and microSD 4.0 readers are the fastest card readers of any dock in this guide — 312MB/s is fast enough that UHS-II cards never wait on the dock. Pair with two colour-accurate 4K monitors in clamshell and you have a capable photo editing station from a MacBook Air.
For video work, the Plugable TBT4-UDZ matches TS4’s card reader speed and adds 2.5GbE for fast NAS access.
Scenario 5: The M3 Air as a Shared Office Dock
You share a desk with someone else (a partner, a colleague) whose machine uses different ports, or you occasionally bring your M3 Air to a Windows-based office setup.
The StarTech TB4 dock (B0CTTR34K9) handles M3 Air clamshell dual display with a 3-year warranty and lifetime technical support — valuable in office environments. It explicitly supports the M3 Air clamshell requirement in its own datasheet, which means the manufacturer has tested and confirmed the configuration. It also supports Linux, making it genuinely multi-platform.
Known Issues and Fixes — M3 Air Specific
Issue: Second Monitor Doesn’t Appear at All
Most likely cause: The M3 Air’s lid is open. This is the most common M3 Air dock issue and almost always the answer.
Fix: Close the lid. The second external monitor should appear within 3–5 seconds. If it doesn’t, wake the Mac by pressing a key on your external keyboard, then wait another few seconds. Both monitors should come on.
Also check: macOS version — you need Sonoma 14.6 or later. Go to System Settings → General → Software Update. Early Sonoma builds don’t support dual external displays on the M3 Air.
Issue: Second Monitor Appeared, Then Disappeared After Waking from Sleep
Why it happens: macOS sometimes doesn’t fully reinitialise the second display output after longer sleep sessions in clamshell mode. One monitor comes back, the other stays dark.
Fix: Disconnect and reconnect the upstream Thunderbolt cable from the Mac (not from the dock — from the Mac). Three seconds, reconnect, and both monitors should reinitialise. This resolves it in the overwhelming majority of cases. If it happens consistently, check for dock firmware updates — CalDigit, Plugable, and Kensington all push sleep/wake patches regularly.
Issue: Wrong Monitor Is Primary After Closing the Lid
Why it happens: macOS assigns primary display status when the lid closes, and the arrangement may not match what you expect based on physical monitor positions.
Fix: System Settings → Displays → Arrangement. Drag the white menu bar indicator to the monitor you want as your primary (the one showing the Dock and menu bar). Also drag the monitor icons to match your physical left/right arrangement. These settings persist across connections.
Issue: Mac Gets Warm or Fans Run in Clamshell
Why it happens: The M3 Air is passively cooled. Closing the lid reduces airflow slightly compared to lid-open. Under normal office workloads this is negligible. Under sustained heavy workloads (export, compilation), the closed chassis has slightly less thermal headroom.
Fix: Use a vertical laptop stand rather than laying the Mac flat — more surface area is exposed, which improves passive heat dissipation noticeably. For sustained heavy work, leave the lid open a crack — even a few millimetres of gap significantly improves airflow. Some users add a small rubber pad under the hinge to keep the lid fractionally open. Not beautiful, but effective.
Issue: DisplayLink Monitors Show No Signal After Restarting

Why it happens: DisplayLink Manager isn’t set to launch at login, so the driver isn’t running when the Mac starts up. The DisplayLink monitors only appear once the app is running.
Fix: Open DisplayLink Manager → Preferences → enable “Launch at Login.” For Baseus Spacemate MAC users specifically: this is a documented issue with that dock — HDMI outputs 2 and 3 produce no signal after restart unless DisplayLink Manager is already running. The fix is the same: launch at login.
Issue: Single Monitor Shows 4K@30Hz Instead of 4K@60Hz
Why it happens: HDMI cable is rated for HDMI 1.4 rather than 2.0, or the monitor is set to the wrong input refresh rate.
Fix: Check your HDMI cable is rated for 18Gbps bandwidth (HDMI 2.0) or HDMI 2.1. A cable labelled “High Speed HDMI” is 1.4; “Premium High Speed HDMI” is 2.0. On the monitor, go to display settings and check that it’s set to 60Hz — some monitors default to 30Hz on HDMI inputs until manually adjusted.
Issue: Ethernet Connection Shows as Connected But Has No Internet
Why it happens: IP address assignment failure — the Mac is connected to Ethernet but DHCP hasn’t assigned an address correctly.
Fix: System Settings → Network → Ethernet → click the three-dot menu → Renew DHCP Lease. If that doesn’t work, toggle the Ethernet interface off and back on. Unplugging and re-plugging the Ethernet cable into the dock resets the hardware handshake and resolves most persistent cases.
Issue: USB SSD Reads at Much Lower Speed Than Expected
Why it happens: On USB-C docks, all connected devices share the upstream bandwidth. A dock with a 10Gbps upstream connection running a display, Ethernet, and a USB SSD simultaneously divides that bandwidth. On TB4 docks, TB SSDs connected to a downstream TB port get their own bandwidth path.
Fix: On a TB4 dock, connect your SSD to the downstream Thunderbolt port rather than a USB-A or USB-C data port — it gets dedicated bandwidth. On a USB-C dock, try to minimise other device activity when doing large transfers. If fast SSD speeds are critical to your workflow, a TB4 dock is worth the upgrade.
Mistakes to Avoid When Buying a Dock for the M3 Air
1. Buying an MST-based “dual display” hub. Many cheap Amazon hubs under $50 claim dual display support using DisplayPort MST. macOS doesn’t support MST for extended displays — you get mirroring, not extension. These look attractive in listings but don’t work as advertised on Mac. Look for either native Thunderbolt output, DisplayLink explicitly mentioned, or USB4.
2. Assuming any Thunderbolt dock automatically gives you dual monitors with the lid open. It doesn’t. Thunderbolt bandwidth doesn’t override the M3 chip’s display limit. The lid must be closed for native dual monitors, regardless of how much Thunderbolt bandwidth your dock provides.
3. Buying a dock with HDMI 1.4 outputs. 4K@30Hz looks acceptable in product listings but is visibly sluggish in daily use. Always check the HDMI version explicitly in the full specs, not just the headline.
4. Buying a TB5 dock. The M3 Air doesn’t have TB5 ports. A TB5 dock falls back to TB4 speeds on this machine — you’d be paying a significant TB5 premium for TB4 performance. Save TB5 budget for the MacBook Pro M4 Pro/Max or M5 Pro/Max.
5. Buying the Baseus Spacemate WIN instead of the MAC version. These two docks look nearly identical in Amazon listings. The WIN version uses MST and mirrors on Mac. The MAC version (ASIN: B0D3QFWPDW) uses DisplayLink and works correctly. Always verify the ASIN before purchasing.
Frequently Asked Questions
Does the MacBook Air M3 support dual monitors without closing the lid?
Natively, no. The M3 base chip supports one external display with the lid open. To run two external monitors with the lid open, you need a DisplayLink dock — the driver bypasses the native display limit. Closing the lid enables native dual display support without any driver.
Which macOS version do I need for M3 Air clamshell dual display?
macOS Sonoma 14.6 or later. Early Sonoma builds (14.0–14.5) only supported one external display on the M3 Air. Go to System Settings → General → Software Update to check your version. If you’re on an older version and dual monitors aren’t working, updating is the fix.
Can I wake my M3 Air from clamshell mode without pressing a physical button?
Yes — pressing any key on an external Bluetooth or USB keyboard wakes the Mac from clamshell sleep. The Mac doesn’t have a power button accessible with the lid closed, so an external keyboard is a practical requirement for clamshell use. Most USB-A keyboards connected through the dock work for wake; Bluetooth keyboards may need a longer keypress.
Does the M3 Air run hotter with the lid closed?
Slightly, because the passively-cooled lid contributes to heat dissipation. In office workloads — writing, browsing, video calls — the temperature difference is negligible. In sustained CPU-heavy tasks, using a vertical laptop stand and leaving the lid fractionally open improves thermals. The M3 chip is efficient enough that this is rarely a practical problem.
Do I need a Thunderbolt dock for M3 Air clamshell mode?
No. A USB-C dock with HDMI 2.0 outputs delivers dual 4K@60Hz in clamshell mode on the M3 Air. Thunderbolt adds bandwidth for high-speed accessories, 6K displays, and TB daisy-chaining — all valuable, but not required for a standard dual-4K clamshell setup.
Why does my second monitor still not work with the lid closed?
Check: (1) macOS version — must be Sonoma 14.6+. (2) The dock has two separate video output ports and two separate HDMI/DP cables going to two separate monitors. (3) If using a TB4 dock with two HDMI ports in groups, use one from each group. (4) Try disconnecting and reconnecting the dock cable after closing the lid. (5) Full restart with lid closed and dock connected.
Can I use the M3 Air’s built-in camera in clamshell mode?
The built-in FaceTime camera is inaccessible when the lid is closed, since it’s built into the lid. For clamshell video calls, you need an external USB webcam connected to the dock, or a Bluetooth/AirPlay-based solution using an iPhone as a webcam via Continuity Camera. Most USB webcams work through any dock’s USB-A port without additional drivers on macOS.
Our Verdict
The MacBook Air M3 has a quirk that trips up a lot of buyers — the dual monitor limitation with the lid open — but once you understand the clamshell solution, it actually turns into a clean, capable desktop replacement without any driver or DisplayLink complexity.
Close the lid. Get a good dock. Use two monitors natively.
That’s the formula, and it works remarkably well. The CalDigit TS4 is the best single investment you can make around the M3 Air for a permanent desk setup — 18 ports, 2.5GbE, fast card readers, and a power supply sized to sustain full performance. The Plugable TBT4-UDZ is the best value among TB4 docks if the TS4 is out of budget. The iVanky FusionDock 1+ is the practical pick if you don’t need Thunderbolt bandwidth.
If closing the lid isn’t for you — if you want the built-in screen available, or you rely on the built-in camera regularly — the Kensington SD4781P brings DisplayLink dual-monitor capability with the lid open, and I ran it that way for a while before settling on clamshell. It works well; it just requires the Chrome workaround for streaming and one extra software layer to manage.
The M3 Air isn’t the most flexible Mac when it comes to external displays. But for the majority of desk setups — a clean clamshell dual-monitor configuration — it delivers everything you need with the right dock.
Last updated: May 2026. Specs verified against Apple MacBook Air M3 tech specs page. The dual display clamshell capability requires macOS Sonoma 14.6+.