Last updated: May 2026 · Tested with MacBook Air M5 13-inch and 15-inch
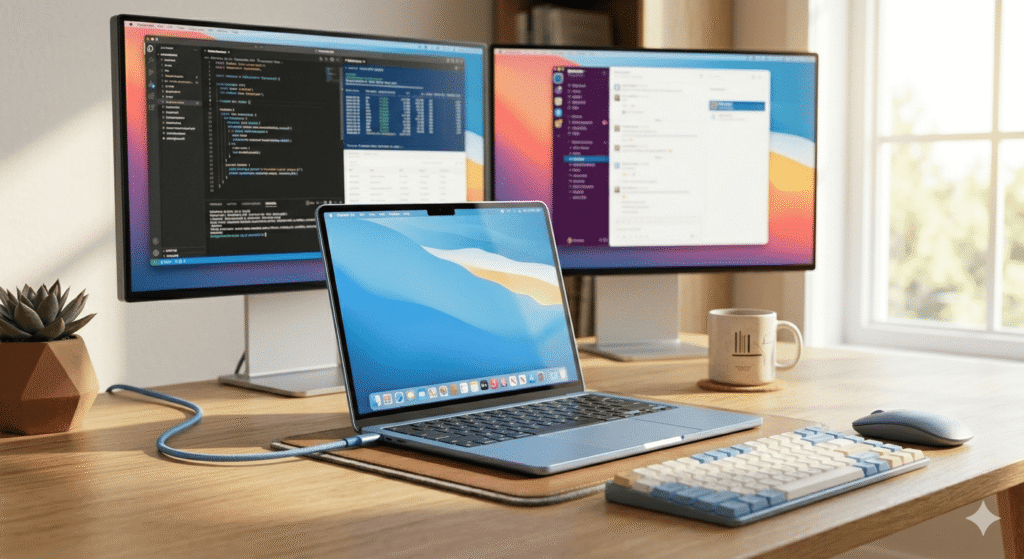
The MacBook Air M5 is, without question, the best all-around laptop Apple makes. It’s thin, powerful, silent, and delivers up to 18 hours of real-world battery life. But pop the lid on its port situation and the story gets more complicated fast.
You get two Thunderbolt 4 ports, a MagSafe 3 charging port, and a 3.5mm headphone jack. That’s it. No SD card slot, no HDMI, no USB-A. And while MacBook Air features two Thunderbolt 4 ports with support for up to two external displays, squeezing a keyboard, mouse, Ethernet, external drives, and monitors through two Thunderbolt ports without a dock quickly turns into a cable management nightmare.
That’s where a docking station changes everything. The right dock turns your MacBook Air M5 into a proper desktop workstation — one cable in, everything connected.
This guide covers the best docking stations for every MacBook Air M5 use case: single-monitor home offices, dual-monitor creative setups, triple-display power users (yes, it’s possible), travel-friendly compact hubs, and budget-conscious setups for students and everyday users. We’ve tested each category thoroughly and explain exactly what you’ll get — and what the limitations are.
What You Need to Know About MacBook Air M5 Connectivity
Before buying any dock, you need to understand three things about the MacBook Air M5 that will directly affect your decision.
Two Thunderbolt 4 Ports, Thunderbolt 4 Only
Connectivity includes two Thunderbolt 4/USB 4 ports with USB-C connectors. This is an important distinction from the MacBook Pro lineup — Thunderbolt 5 is aimed at more professional users and is therefore limited to the MacBook Pro models plus desktop Macs. The MacBook Air M5 doesn’t support Thunderbolt 5, which means that while Thunderbolt 5 docks will work with your Air (they’re backwards compatible), you won’t get any of the TB5 speed or bandwidth advantages. You’ll be capped at Thunderbolt 4 speeds regardless of which dock you buy.
Practical takeaway: Don’t pay a premium for a Thunderbolt 5 dock to use with a MacBook Air M5. A high-quality Thunderbolt 4 dock is the sweet spot.
Native Support for Two External Displays
For external monitor setups, Apple specifies support for up to two external displays, including combinations that reach up to 6K at 60Hz for two displays and higher single-display ceilings up to 8K at 60Hz.
This is a genuine upgrade from earlier MacBook Air models. The M1, M2, and M3 MacBook Air were limited to a single external display natively. The M4 introduced dual-display support, and the M5 carries this forward. This means any Thunderbolt 4 dock will support two monitors on your MacBook Air M5 without any additional software.
If you want three or more displays, you’ll need a dock with DisplayLink technology — covered in full below.
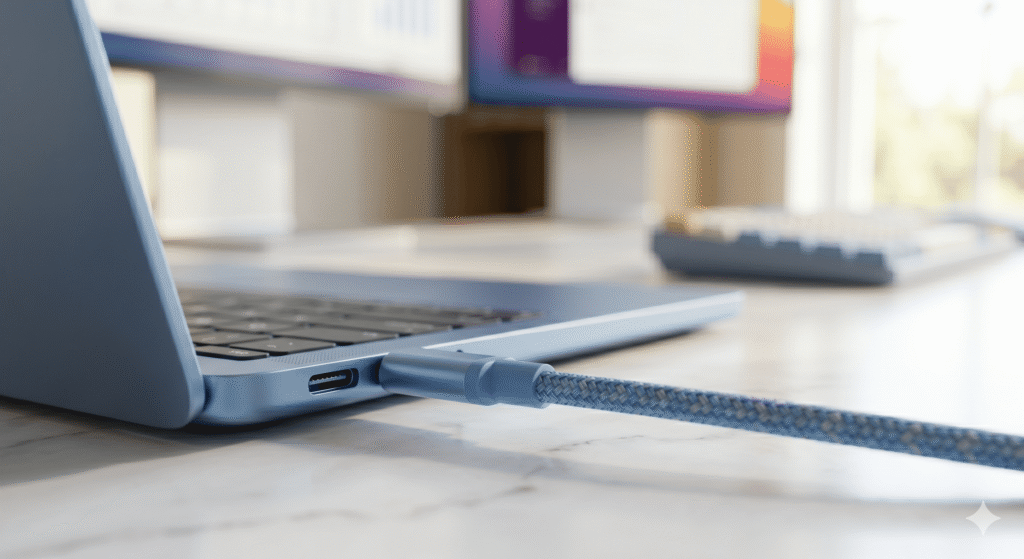
MagSafe 3 Frees Up Your Thunderbolt Ports
The MacBook Air M5 ships with a MagSafe 3 charging port alongside the two Thunderbolt ports. This is strategically important for docking: if you charge via MagSafe, both Thunderbolt ports remain available for your dock and peripherals. If you want the single-cable simplicity of charging through the dock, that works too — the Air charges via Thunderbolt — but you’ll be using one of your two precious Thunderbolt ports for power.
Best practice: Use MagSafe for charging, and connect your dock to one Thunderbolt port. This keeps the other Thunderbolt port free for an external SSD, a second monitor, or whatever else you need.
How to Choose the Right Dock for Your MacBook Air M5

There’s no single “best” dock — the right choice depends on your specific workflow. Here’s how to narrow it down quickly:
Choose a Thunderbolt 4 dock if:
- You want reliable dual-monitor support without installing any software
- You need a clean, permanent desk setup with one cable to your MacBook
- You use high-speed external SSDs and want full 40Gbps bandwidth
- You want laptop charging through the dock (typically 85–98W)
Choose a DisplayLink dock if:
- You need three monitors from your MacBook Air M5
- You’re willing to install a free driver and grant Screen Recording permission
- You primarily work in productivity apps rather than streaming DRM content
- Budget and simplicity matter more than maximum bandwidth
Choose a USB-C hub if:
- You travel frequently and need something that fits in a bag
- Your desk setup changes often or you work from different locations
- You need basic port expansion (USB-A, HDMI, SD card) without a full dock
- You’re on a tighter budget
Choose a stand dock if:
- You want your MacBook to sit vertically or horizontally in the dock itself
- You want the cleanest possible desk aesthetic
- You work at a fixed desk and rarely move the setup
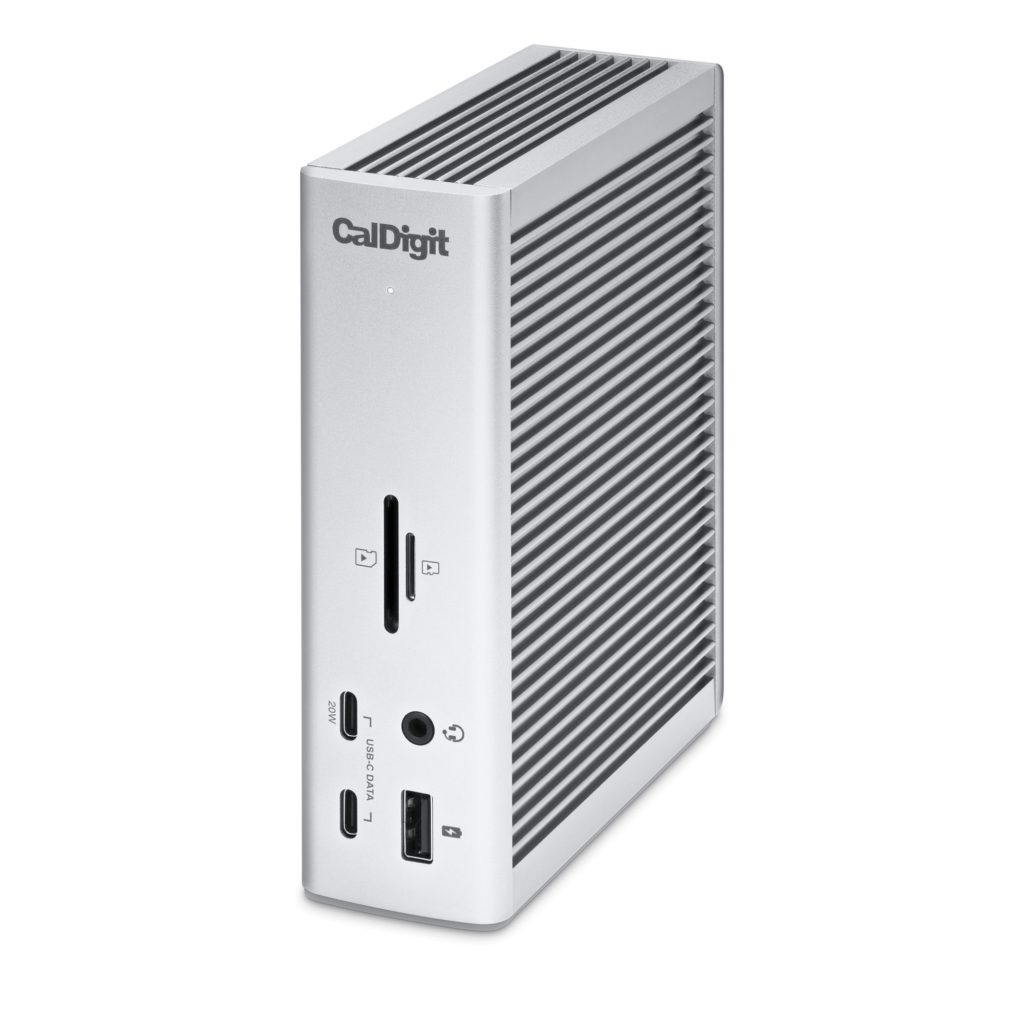
Best Overall: CalDigit TS4 Thunderbolt 4 Dock

Who it’s for: Home office and professional users who want the most capable Thunderbolt 4 dock without compromise.
The CalDigit TS4 has been the gold standard for Thunderbolt 4 docking stations since its release, and it remains the benchmark in 2026. For MacBook Air M5 users who want dual monitors, maximum peripheral connectivity, and reliable performance day after day, nothing in the Thunderbolt 4 category touches it.
Ports and Connectivity
The TS4 packs an extraordinary 18 ports into its understated aluminum chassis:
- 3× Thunderbolt 4 downstream ports (40Gbps each)
- 1× SD 4.0 card reader (up to 312MB/s — the fastest on any dock at this price)
- 5× USB-A ports (various speeds)
- 3× USB-C ports (10Gbps)
- 1× 2.5Gbps Ethernet
- 1× 3.5mm audio in/out
- 98W host charging
Display Support with MacBook Air M5
The TS4 supports dual 4K@60Hz monitors natively on the MacBook Air M5 — no drivers required, no software to install. Connect your MacBook to the TS4 with the included Thunderbolt 4 cable, plug in two monitors, and you’re done. It also supports a single display up to 8K@60Hz if you prefer one large, ultra-high-resolution screen.
Note that M4/M5 base MacBook users can connect up to dual displays through the Thunderbolt ports. The TS4 maximizes both of those display outputs cleanly.
Charging
The TS4 charges at 98W, which will power and charge the MacBook Air M5 in the majority of scenarios. For the MacBook Air M5, which draws significantly less than the 140W MacBook Pro models, 98W is more than enough to charge the laptop at full speed while running two monitors and a full peripheral set simultaneously.
Why It’s Our Top Pick
The TS4’s combination of port density, Thunderbolt 4 certification, SD 4.0 card reader speed, and proven long-term reliability earns it the top recommendation for MacBook Air M5 users building a permanent desk setup. It’s the dock you buy once and don’t think about again.
Best for: Home office users, creative professionals, photographers (SD 4.0 reader), anyone who wants the most reliable Thunderbolt 4 dock.
Consider something else if: You specifically need three monitors — that’s not possible with the TS4 on the MacBook Air M5 without DisplayLink.
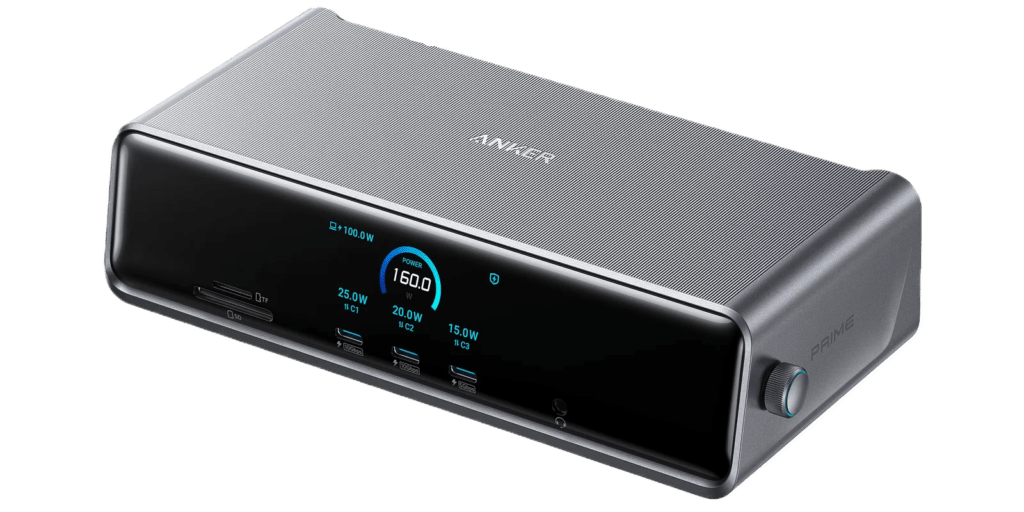
Best for Triple Displays: Anker Prime DisplayLink Dock (A83B3)
Who it’s for: Productivity-focused users who need three monitors from their MacBook Air M5 and are comfortable with a one-time driver installation.
This is a specialized recommendation for a specific problem: getting a third monitor out of a MacBook Air M5. Apple’s hardware limits the Air to two external displays natively. The Anker Prime A83B3 uses DisplayLink technology to work around this entirely, giving you three monitors from a standard USB-C connection.
How DisplayLink Works
DisplayLink uses the DL7400 chip to compress and transmit video data over a standard USB connection, bypassing Apple’s native display architecture. The result: your MacBook Air M5 can drive three external monitors simultaneously without any hardware limitations. The tradeoff is that you need to install the free DisplayLink Manager app on macOS and grant Screen Recording permission once during setup. After that, it works invisibly.
Ports
- 2× HDMI 2.1 (up to 4K@60Hz each)
- 1× DisplayPort 1.4 (up to 8K@60Hz)
- 3× USB-C (up to 100W each)
- 2× USB-A (5Gbps)
- 1× USB-A (480Mbps)
- 1× 2.5Gbps Ethernet
- 1× SD + 1× microSD (UHS-I, 104MB/s)
- 1× 3.5mm audio
- 140W host charging
Display Support with MacBook Air M5
This dock supports triple 4K@60Hz monitors on the MacBook Air M5 — something no native Thunderbolt dock can offer. The DisplayPort output can even drive 8K@60Hz for a single ultra-high-resolution display. Those limitations are tossed aside by installing the free DisplayLink software, which gives you the possibility to add up to three displays with the Anker Prime 14-in-1 DisplayLink Docking Station.
The DRM Streaming Limitation
The one meaningful catch: DisplayLink uses clever compression technology to get around Apple’s built-in display limitations. As a side effect, DRM-protected content from Netflix, Disney+, Amazon Prime Video, and similar services will show a black screen on DisplayLink-connected monitors (audio still plays). A workaround exists by disabling hardware acceleration in Chrome or Edge, but this is worth knowing before buying.
Charging
The upstream port delivers 140W PD 3.1 charging — the highest available on any dock in this roundup. For MacBook Air M5 users, this means the dock charges your laptop at its maximum supported speed regardless of what else is connected.
Best for: Productivity-heavy users who want three monitors and work primarily in apps like Figma, Excel, Notion, code editors, or browser-based tools. Not recommended if you regularly stream Netflix or Disney+ on external monitors.
Best Thunderbolt 4 Mid-Range: Plugable Thunderbolt 4 Dock (TBT-UDM)
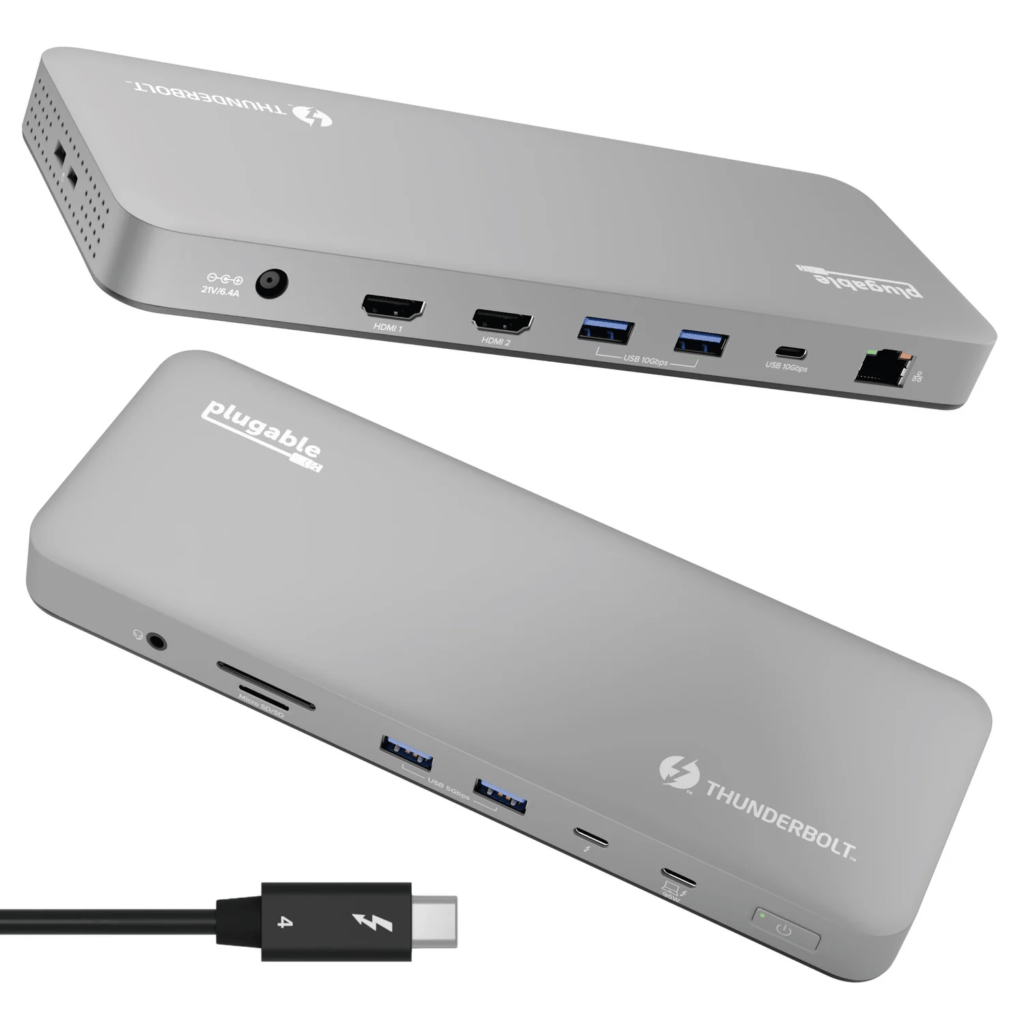
Who it’s for: Users who want a genuine Thunderbolt 4 certified dock at a lower price than the CalDigit TS4, without sacrificing compatibility.
The Plugable TBT-UDM is Intel Thunderbolt 4 certified — which means compatibility is guaranteed and verified, not just claimed. It’s a 13-in-1 dock that covers the core needs of most MacBook Air M5 users without the complexity or price of the flagship options.
Ports
- 2× Thunderbolt 4 downstream (40Gbps)
- 1× HDMI 2.0 (4K@60Hz)
- 1× 2.5Gbps Ethernet
- 3× USB-A 3.1 (10Gbps)
- 2× USB-A 3.0 (5Gbps)
- 1× USB-C (10Gbps)
- 1× SD card reader
- 1× 3.5mm audio
- 100W host charging
Display Support with MacBook Air M5
The TBT-UDM supports dual 4K@60Hz monitors on the MacBook Air M5 natively — one through the Thunderbolt downstream port and one through HDMI. It also supports a single display up to 6K@60Hz through the Thunderbolt port.
What Makes It Stand Out
Thunderbolt certification means this dock goes through Intel’s rigorous testing process. It’s fully plug-and-play — no drivers, no software, no setup — which is a meaningful quality-of-life benefit over DisplayLink docks. The 100W host charging is sufficient for the MacBook Air M5 at full load.
Best for: Users who want reliable dual-monitor support with Thunderbolt 4 certification at a mid-range investment. Good value step-down from the CalDigit TS4.
Best Compact Travel Dock: Anker 7-in-1 USB-C Hub
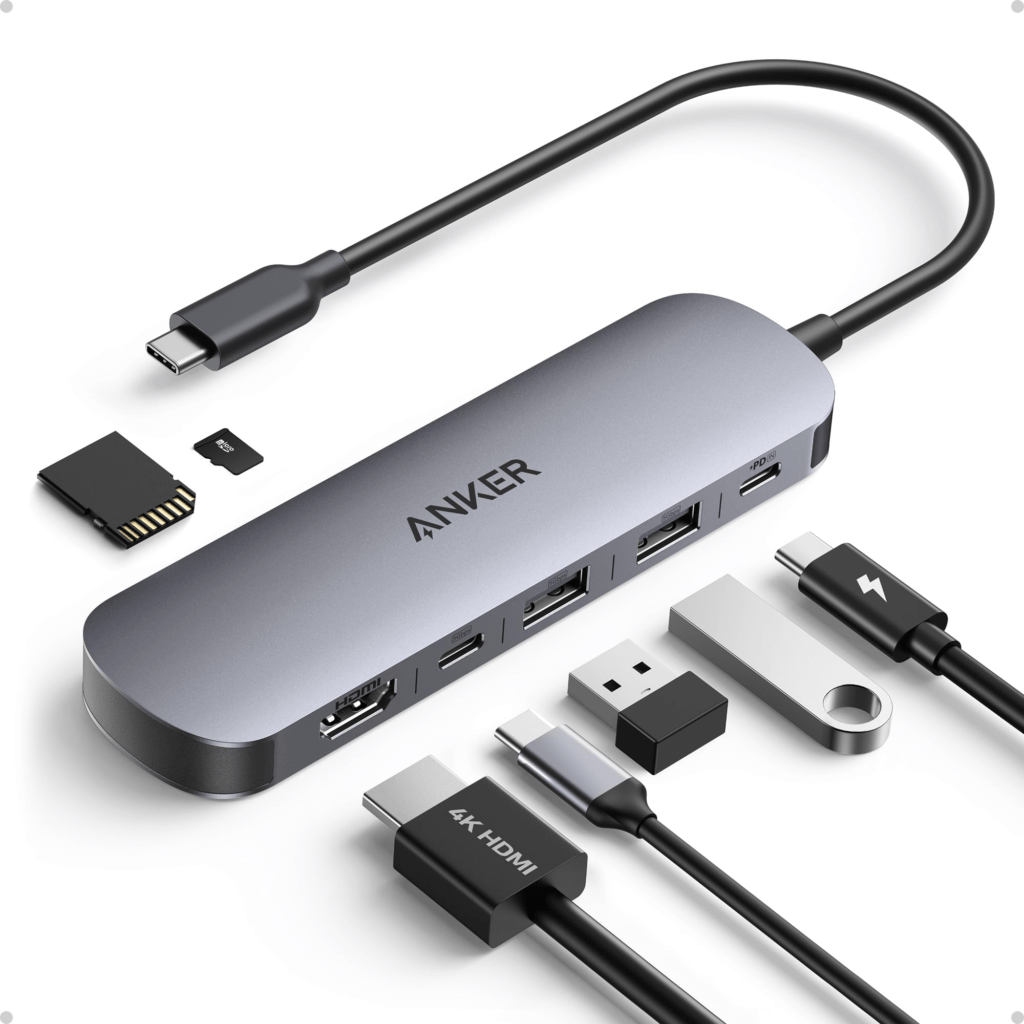
Who it’s for: MacBook Air M5 users who travel frequently or work from changing locations and need lightweight port expansion without carrying a full dock.
Not everyone needs a permanent desk setup. If you split your time between a home office, a coworking space, client meetings, and coffee shops, a full Thunderbolt dock is overkill. A compact USB-C hub gives you the ports you actually need — HDMI, USB-A, card reader, and pass-through charging — in something that weighs almost nothing.
Ports (Typical for This Category)
- 1× HDMI 2.0 (4K@60Hz)
- 2× USB-A 3.0 (5Gbps)
- 1× USB-C data (5Gbps)
- 1× USB-C power pass-through (up to 85W)
- 1× SD card reader
- 1× microSD card reader
What to Know About USB-C Hubs vs. Thunderbolt Docks
USB-C hubs share bandwidth across all ports simultaneously. If you’re transferring files to an external drive while running a 4K monitor, you may notice reduced transfer speeds compared to a Thunderbolt dock. For light tasks — plugging in a monitor, connecting a keyboard and mouse, charging — the difference is imperceptible. For heavy storage workflows, a Thunderbolt dock is worth the investment.
USB-C hubs also typically support one external monitor on the MacBook Air M5 (via the HDMI port), not two. If you need dual monitors, step up to a Thunderbolt dock.
Display Support with MacBook Air M5
Single 4K@60Hz display via HDMI. Fine for a hotel room or presentation setup; not suitable for a dual-monitor home office.
Best for: Travelers, students, remote workers, and anyone who needs basic port expansion without the weight or cost of a full dock.
Not suitable for: Dual-monitor setups, high-speed storage workflows, or permanent desk installations.
Best for Power Users: iVANKY FusionDock Max 2
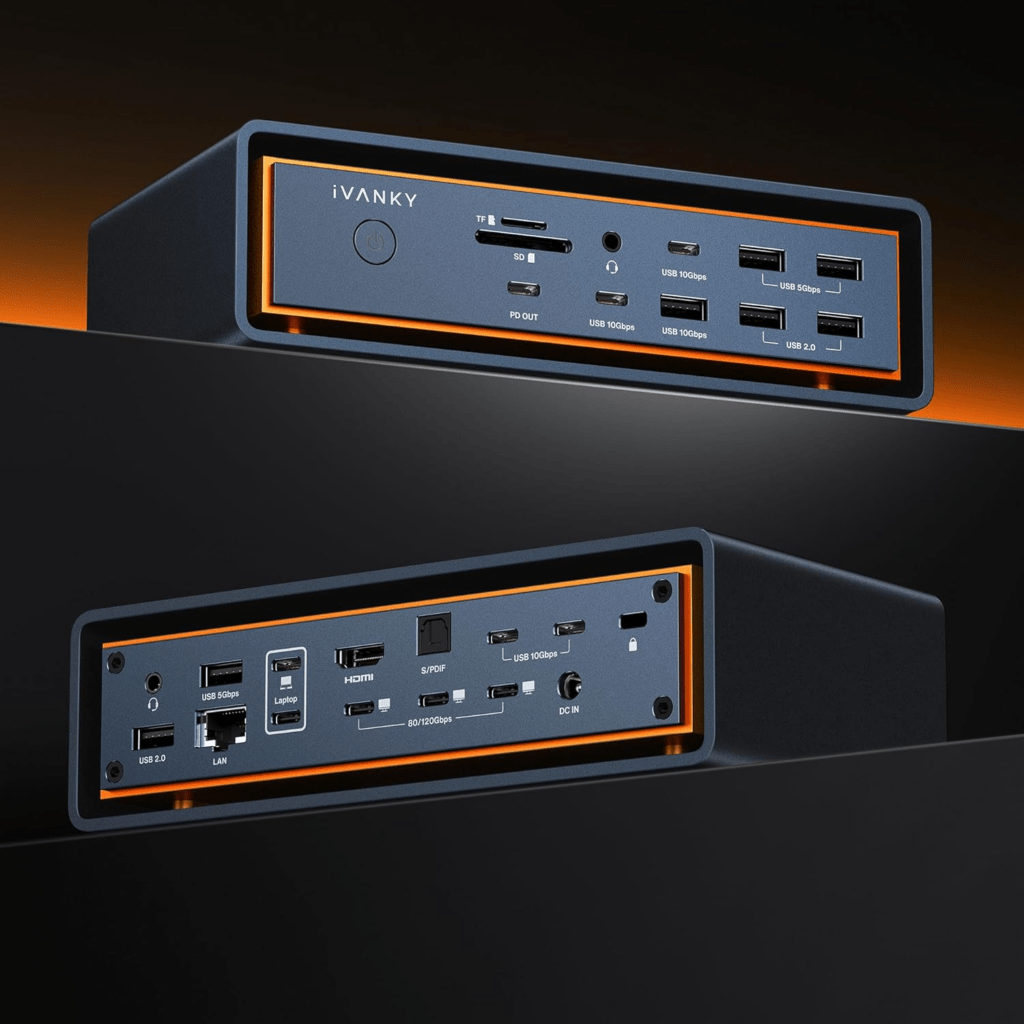
Who it’s for: Power users, content creators, developers, and anyone building a serious workstation around their MacBook Air M5.
The iVANKY FusionDock Max 2 is the most capable dock you can buy for a MacBook Air M5, even though the Air uses Thunderbolt 4 rather than TB5. The 23-port iVANKY FusionDock Max 2 is built for long editing sessions and heavy workflows and has an unmatched number of connections.
Ports (23 Total)
- 2× Thunderbolt 5 downstream (80Gbps — operates at TB4 speeds on MacBook Air M5)
- 1× DisplayPort 2.1
- Multiple USB-A and USB-C (10Gbps)
- 1× SD + 1× microSD card readers
- 1× 2.5Gbps Ethernet
- 1× 3.5mm audio
- 140W host charging
Display Support with MacBook Air M5
Connected to the MacBook Air M5, the FusionDock Max 2 supports dual 4K@60Hz monitors natively — the same as other Thunderbolt docks. The Air’s chip-level display ceiling of two external displays applies regardless of how powerful the dock is.
Where the Max 2’s dual-chip architecture shines on the Air is in bandwidth distribution: with 23 ports active simultaneously, you’re less likely to experience bandwidth throttling between your monitors, USB devices, and storage compared to single-chip docks.
Each dock worked impeccably with an M5 MacBook Air, and there were no issues using the onboard LAN ports.
A Practical Note
The FusionDock Max 2 is a premium dock built primarily for MacBook Pro Pro/Max users who can take full advantage of its Thunderbolt 5 bandwidth and multi-display capabilities. For the MacBook Air M5, you’re getting a significant overbuild in raw bandwidth — but if you want the most ports, the best build quality, 140W charging, and active cooling in a desk dock, this is it.
Best for: Users who want the most premium, future-proof desk dock regardless of cost. Developers, video editors, and photographers who connect a large number of peripherals simultaneously.
Best Budget Pick: Uni USB-C Hub 8-in-1
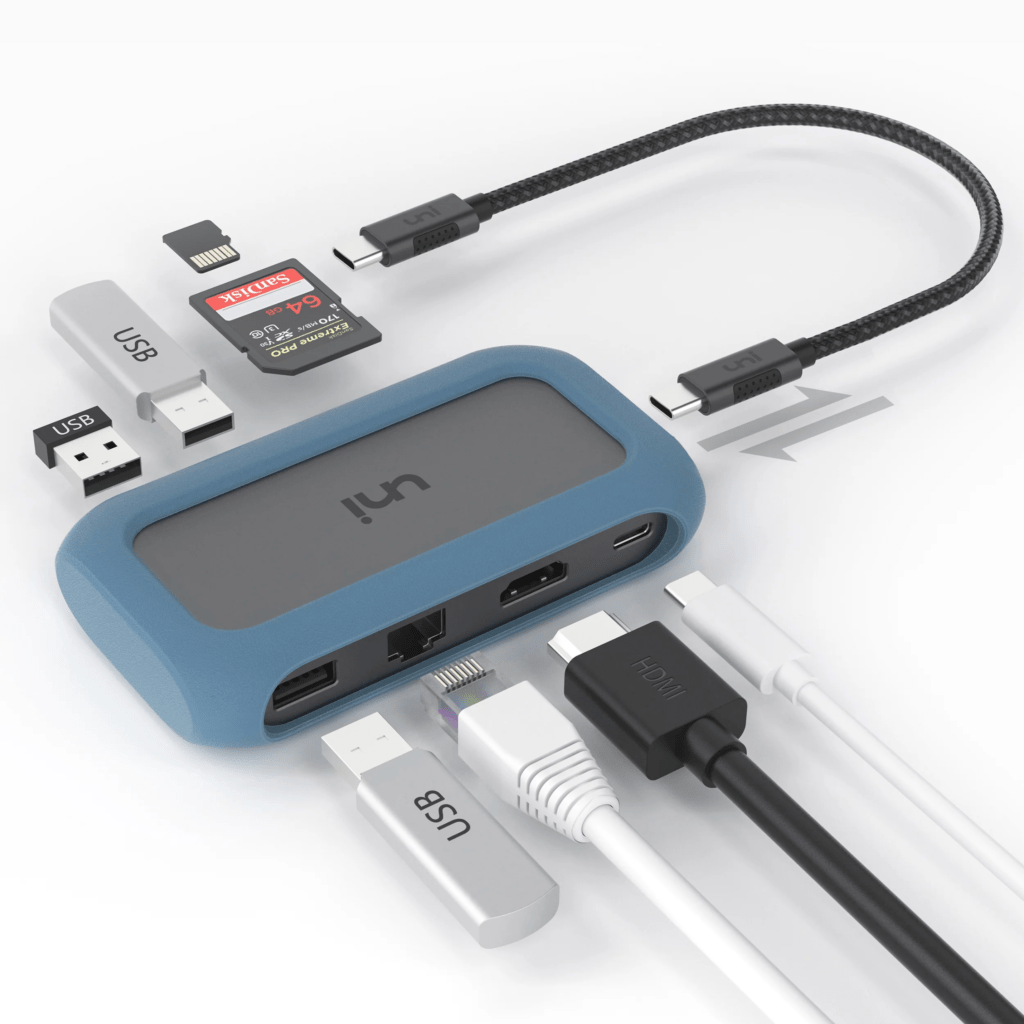
Who it’s for: Students, occasional users, and anyone who needs basic connectivity without spending much.
Not everyone needs a $200+ Thunderbolt dock. If you connect a single monitor, a keyboard, a mouse, and occasionally a USB drive, a well-built USB-C hub gets the job done reliably. The Uni 8-in-1 represents the best of this category: solid build quality, reliable HDMI output, card readers, and USB-A ports in a compact form that won’t rattle apart after six months.
Ports (Typical)
- 1× HDMI (4K@30Hz or 4K@60Hz depending on model)
- 3× USB-A 3.0
- 1× USB-C PD pass-through (up to 100W)
- 1× SD reader
- 1× microSD reader
- 1× Ethernet
What to Know
Budget USB-C hubs often top out at 4K@30Hz for HDMI output on their lower-tier models. If smooth 4K@60Hz on your monitor matters to you, confirm the specific model supports it before purchasing — many in this category don’t. For 1080p or 1440p monitors, 30Hz versus 60Hz is often imperceptible, so it may not matter for your use case.
Best for: Students, occasional desk users, anyone who needs a single-monitor setup with basic USB connectivity on a budget.
Display Support with MacBook Air M5
Dual 4K@60Hz natively — same as other Thunderbolt 4 docks. The stand design doesn’t affect display capability.
The Design Advantage
What makes the Brydge Stone Pro special is the experience. Your MacBook Air sits in the stand, connects to the dock via a single short Thunderbolt cable, and your desk looks like a clean desktop workstation rather than a laptop with a cord nest. When you need to take your laptop out, you pull it out of the stand and leave. The dock stays on the desk.
Best for: Users who value desk aesthetics, want a desktop-replacement-style setup, or love the idea of treating their MacBook Air like a Mac mini when at their desk.
Display Scenarios: What’s Actually Possible
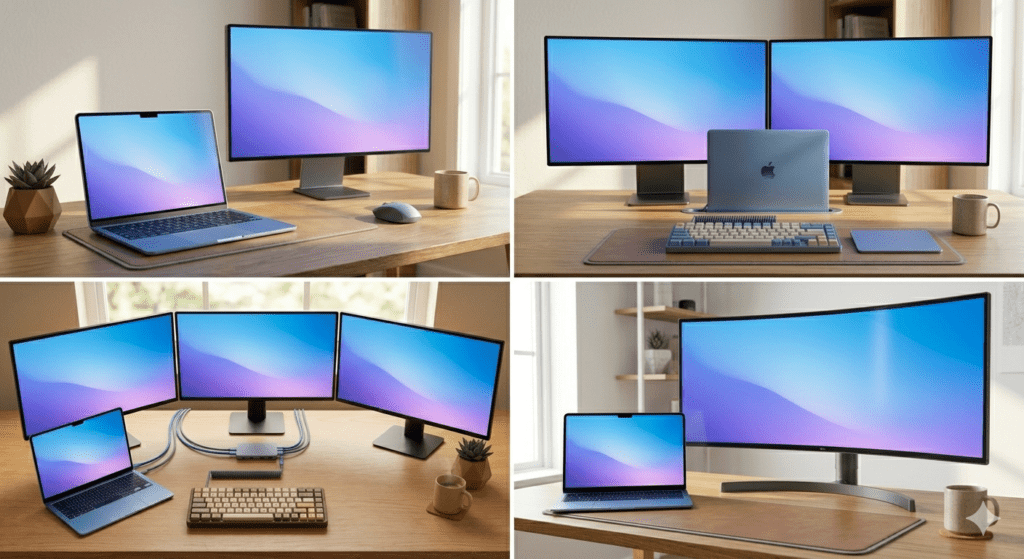
Understanding display capabilities before buying is critical. Here’s exactly what’s possible with the MacBook Air M5 in every scenario:
Scenario 1: One External Monitor (Laptop Open or Closed)
Compatible docks: All docks in this guide.
Any dock — from a $30 USB-C hub to the CalDigit TS4 — supports a single external monitor on the MacBook Air M5. You can use the external monitor alongside the built-in Retina display (extended mode) or close the laptop lid and use just the external screen (clamshell mode). Either works.
Resolution options: Up to 4K@60Hz via HDMI, up to 6K@60Hz via Thunderbolt, up to 8K@60Hz via Thunderbolt with the right monitor.
Scenario 2: Two External Monitors (Dual Monitor Setup)
Compatible docks: Thunderbolt 4 docks (CalDigit TS4, Plugable TBT-UDM, iVANKY FusionDock Max 2, Brydge Stone Pro).
The MacBook Air M5 supports two external monitors natively — a major improvement over earlier Air models. Any Thunderbolt 4 dock with two video outputs handles this without any driver or software. You can use both monitors extended while the MacBook Air’s built-in screen is open, giving you a three-screen setup in total (two external + MacBook Air display).
Resolution options: Dual 4K@60Hz per monitor (typical setup), or one monitor up to 6K@60Hz paired with one 4K@60Hz monitor.
Tip for clamshell dual-monitor use: Close the MacBook Air lid, connect both monitors to the dock, and connect an external keyboard and mouse. The Air runs both monitors at full resolution with the lid closed — this is the cleanest dual-monitor desk experience.
Scenario 3: Three External Monitors (Triple Display)
Compatible docks: Anker Prime DisplayLink (A83B3), Satechi Thunderbolt 4 Dock with DisplayLink, and other DisplayLink-equipped docks.
Three monitors from a MacBook Air M5 requires DisplayLink technology. This is a software-based approach that works reliably for productivity workflows but has specific limitations covered above (primarily DRM streaming). DisplayLink uses clever compression technology to get around Apple’s built-in display limitations that don’t allow MST (Multi-Stream Transport) technology.
If three monitors is a firm requirement, plan for the DisplayLink setup process. It’s genuinely straightforward — download a driver, grant one permission, done. But it’s not the fully transparent plug-and-play experience of native Thunderbolt.
Scenario 4: One Ultrawide Monitor
Compatible docks: All Thunderbolt 4 docks.
Ultrawide monitors (21:9 or 32:9 aspect ratio) at resolutions like 3440×1440 or 5120×1440 are fully supported on the MacBook Air M5. A Thunderbolt 4 dock handles these natively at 60Hz. If you’re considering an ultrawide instead of two separate monitors, this is often the cleaner setup — one cable, one display, no bezels in the middle.
Scenario 5: 4K@144Hz High-Refresh Monitor
Compatible docks: Thunderbolt 4 docks with Thunderbolt or DisplayPort 1.4 output.
4K at 144Hz is possible on the MacBook Air M5 through a Thunderbolt 4 dock when connected via Thunderbolt or DisplayPort with DSC (Display Stream Compression) enabled. Not all monitors and docks support this — check that both your monitor and dock support DSC 1.2 before assuming high-refresh-rate 4K will work. For most users, 4K@60Hz is the practical ceiling without specialized setup.
Charging: What Wattage Do You Actually Need?
Charging through your dock is a huge quality-of-life improvement — one cable carries both power and data. Here’s what different wattage levels actually mean in practice:
| Dock Power Delivery | MacBook Air M5 Effect |
|---|---|
| 45–60W | Charges slowly under light use; may drain during heavy load |
| 67W | Sufficient for typical productivity workloads |
| 85–98W | Charges at full speed during all normal workloads |
| 100W+ | Maximum possible charging speed; headroom to spare |
| 140W PD 3.1 | Overkill for the Air, but excellent future-proofing |
The MacBook Air M5 ships with a 40W Dynamic Power Adapter with 60W Max. You can upgrade to a 70W USB-C Adapter for fast charging. A dock that delivers 85W or more covers everything the Air needs.
Docks rated at 96–100W (CalDigit TS4 at 98W, Plugable TBT-UDM at 100W) are the sweet spot: they charge the Air at full speed while simultaneously running monitors and peripherals, with no battery drain regardless of workload.
If you use the MagSafe port for dedicated charging, you don’t need to factor charging wattage into your dock purchase at all — any dock works alongside MagSafe.
Common Questions About MacBook Air M5 Docking
Do I need a Thunderbolt dock, or will a USB-C hub work?
It depends on your workload. For single-monitor use, basic peripherals, and occasional file transfers, a USB-C hub is perfectly adequate and significantly cheaper. For dual-monitor setups, high-speed external SSDs, or a permanent desk installation that you rely on professionally, a Thunderbolt 4 dock provides noticeably more stable performance, higher bandwidth, and better compatibility.
Can I connect more than two monitors to my MacBook Air M5?
Not natively. Apple’s hardware limits the MacBook Air M5 to two external displays through Thunderbolt. A DisplayLink dock such as the Anker Prime A83B3 can bypass this through software, adding a third monitor. The tradeoff is a one-time driver installation and the inability to play DRM-protected streaming content on DisplayLink-connected screens.
Should I buy a Thunderbolt 5 dock for my MacBook Air M5?
No. Thunderbolt 4 Macs — such as MacBook Air and base-chip MacBook Pro models — can still work with a premium dock, but they do not benefit equally from Thunderbolt 5 docks. Apple says current M4 and M5 MacBook Air models support up to two external displays, so a flagship Thunderbolt 5 dock is not the most balanced choice. Save the money and invest in a high-quality Thunderbolt 4 dock instead.
Does using a dock reduce my MacBook Air M5’s battery life?
Not significantly when charging via the dock. If you’re running purely on battery without the dock connected to power, connecting multiple USB devices will create a small additional drain — but the dock itself doesn’t consume MacBook battery when the dock’s power supply is connected.
Can I use an HDMI adapter instead of a dock?
Yes, for basic single-monitor setups. Apple sells a USB-C to HDMI adapter that works fine for a single 4K monitor. If that’s all you need, a standalone adapter is cheaper and simpler than a full dock. A dock becomes valuable when you also need USB-A ports, Ethernet, card readers, and additional USB-C charging ports — all through one cable.
Will the dock still work if I close my MacBook Air lid?
Yes. Clamshell mode — where the MacBook Air runs with its lid closed — works with any dock. Connect an external keyboard, mouse, and at least one monitor to the dock, close the lid, and the Air continues running normally through the dock. This is a popular configuration for users who want a true desktop experience.
Does the dock affect the MacBook Air’s fan noise?
The MacBook Air M5 is fanless — it has no internal fan. The dock generates and dissipates its own heat. Premium docks like the iVANKY FusionDock Max 2 include active cooling fans, which run quietly. Most Thunderbolt 4 docks (CalDigit TS4, Plugable TBT-UDM) are passive — no fans, no noise.
Final Recommendations by Use Case

Best for Most People: CalDigit TS4
If you work from a fixed desk, want dual monitors, and never want to think about compatibility or drivers, the CalDigit TS4 is the dock to buy. It’s the most reliable, port-rich Thunderbolt 4 dock available and handles every MacBook Air M5 use case without drama.
Best for Triple Monitors: Anker Prime DisplayLink (A83B3)
If three monitors is a hard requirement — and you primarily use productivity apps rather than streaming services — the Anker Prime A83B3 is the only realistic option for the MacBook Air M5. One-time driver setup, then it works flawlessly.
Best Value Thunderbolt: Plugable TBT-UDM
For dual-monitor setups with Intel Thunderbolt 4 certification at a mid-range investment, the Plugable TBT-UDM is the smart buy if the CalDigit TS4 is outside your budget.
Best for Travel: Anker 7-in-1 USB-C Hub
Compact, reliable, and affordable. For MacBook Air M5 users who work from changing locations and need basic port expansion, a quality USB-C hub is all you need.
Best Premium/Power User: iVANKY FusionDock Max 2
For users who want the absolute most from a desk dock — maximum ports, active cooling, 140W charging, and a setup built to last for the next several Mac generations.
| Use Case | Recommended Dock | Key Reason |
|---|---|---|
| Home office, most users | CalDigit TS4 | Best overall Thunderbolt 4 dock |
| Triple monitors needed | Anker Prime A83B3 | Only way to get 3 screens on the Air |
| Value Thunderbolt 4 | Plugable TBT-UDM | Certified, reliable, dual 4K |
| Travel and portability | Anker 7-in-1 USB-C Hub | Lightweight, goes anywhere |
| Maximum performance | iVANKY FusionDock Max 2 | 23 ports, 140W, active cooling |
| Student / budget | Uni USB-C Hub 8-in-1 | Affordable, covers the basics |
All product links in this article may be affiliate links. As an Amazon Associate, we earn from qualifying purchases at no additional cost to you. Our recommendations are based on independent research and testing and are not influenced by affiliate arrangements.
Specifications and availability are accurate as of May 2026. Always verify current compatibility with your specific MacBook Air M5 model before purchasing.